Wired Network Scenarios
• Scenario 1: Connect your Rover AP to a router
• Scenario 2: Connect your Rover Router to an access point
Scenario 1: Connect your Rover AP to the Rover Router
Follow the steps below to set up your Rover AP with a router (the Rover Router as an example). Connect the Rover Router to the Internet. The Rover Router must be connected to a modem/router using an Ethernet cable. Then, connect a LAN port on the Rover AP to a LAN port on the Rover Router using another Ethernet cable.
Device | term | role |
|---|---|---|
Zyxel Device in Router mode | Rover Router | Router |
Zyxel Device in AP mode | Rover AP | Access Point |
1 Turn on your modem/router for Internet access. Connect an Ethernet cable from a modem/router to the WAN port on the Rover Router.
2 Note the power LEDs when you’re done. The power LEDs should be steady blue. Place the Rover AP where you want WiFi coverage and connect it to the Rover Router using an Ethernet cable.
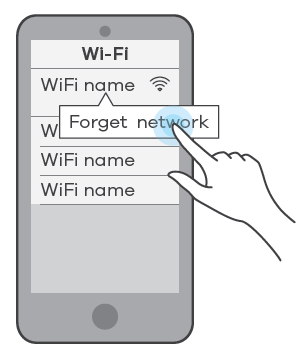
3 Download the app to your smartphone and log into the Rover Router’s WiFi network using the default label information on the back label. You may need to forget your current WiFi connection on your smartphone.
4 Change the default SSID and WiFi key on the Rover Router for better WiFi security; see Setting Up General WiFi Settings for more information. After applying changes, you will need to reconnect to Rover Router again using the new SSID and WiFi key.
5 Use WPS to copy the SSID and WiFi key from the Rover Router to the Rover AP. Press the WPS button on the Rover Router for 1.5 to 4 seconds and then press the WPS button on the Rover AP until the LED blinks in purple within 120 seconds.
6 Use the Rover app and the table below to see if the access point is securely connected to the Rover Router; see Devices Settings for more information.
icon | Connection type | wifi status |
|---|---|---|
 | Wired | Wired Connection |
Wired | Blocked | |
 | Wireless | Good to Go |
 | Wireless | Too Close to the Router |
 | Wireless | Weak WiFi |
Wireless | Blocked |
Scenario 2: Connect the Rover Router to the WRE6605 AP
Follow the steps below to set up the Rover Router with an access point (the WRE6605AP as an example). Connect the Rover Router to the Internet. The Rover Router must be connected to a modem/router using an Ethernet cable. Then, connect the LAN port on the WRE6605AP to a LAN port on the Rover Router using another Ethernet cable.
Device | Term | role |
|---|---|---|
Zyxel Device in Router mode | Rover Router | Router |
WRE6605 in AP mode | WRE6605 AP | Access Point |
1 Turn on your modem/router for Internet access. Connect an Ethernet cable from a modem/router to the WAN port on the Rover Router.
2 Note the power LEDs when you’re done. The power LEDs should be steady blue. Place the WRE6605 AP where you want WiFi coverage and connect it to the Rover Router using an Ethernet cable.
3 Download the Rover app to your smartphone and log into Rover Router’s WiFi network using the default label information on the back label. You may need to forget your current WiFi connection on your smartphone.
4 Change the default SSID and WiFi key on the Rover Router for better WiFi security; see Setting Up General WiFi Settings for more information. After applying changes, you will need to reconnect to the Rover Router again using the new SSID and WiFi key.
5 Use WPS to copy the SSID and WiFi key from the Rover Router to the WRE6605 AP. Press the WPS button on the Rover Router for 1.5 to 4 seconds and then press the WPS button for 2 seconds on the WRE6605 AP within 120 seconds.
6 Use the Rover app and the table below to see if the access point is securely connected to the Rover Router; see Devices Settings for more information.
icon | Connection type | wifi status |
|---|---|---|
| Wired | Wired Connection |
Wired | Blocked | |
| Wireless | Good to Go |
| Wireless | Too Close to the Router |
| Wireless | Weak WiFi |
Wireless | Blocked |