WiFi Network Setup
In this example, you want to set up a WiFi network so that you can use your notebook to access the Internet. In this WiFi network, the Multy Device is an Primary Multy (PM) connected to a router/modem using an Ethernet cable, and the notebook is a WiFi client. The WiFi client can access the Internet through the Primary Multy.
WiFi Network Setup
See the label on the Multy Device for the WiFi network settings and then connect manually to the Multy Device. Alternatively, you can set up a WiFi network using WPS. See WPS Push Button Configuration (PBC).
Changing Security on a WiFi Network
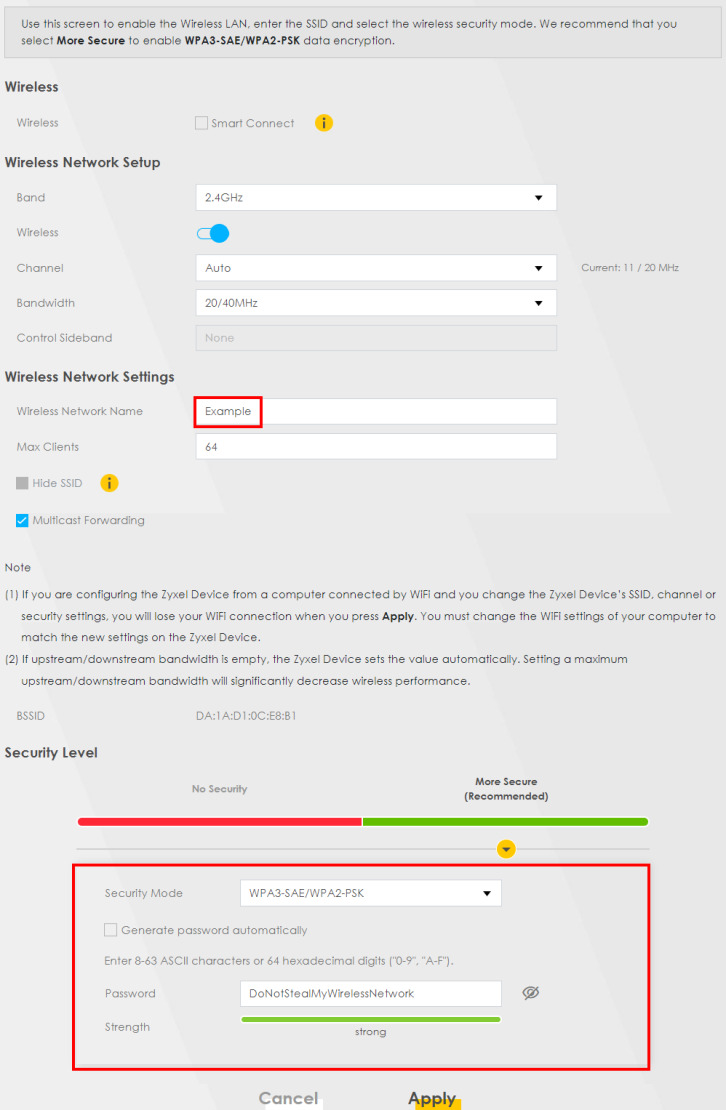
This example changes the default security settings of a WiFi network to the following:
SSID | Example |
Security Mode | WPA3-SAE/WPA2-PSK |
Pre-Shared Key | DoNotStealMyWirelessNetwork |
1 Go to the Network Setting > Wireless > General screen. Select More Secure as the security level and WPA3-SAE/WPA2-PSK as the security mode. Configure the screen using the provided parameters. Click Apply.
You can now use the WPS feature to establish a WiFi connection between your notebook and the Multy Device (see WPS Push Button Configuration (PBC)). Now use the new security settings to connect to the Internet through the Multy Device using WiFi.
Connecting to the Multy Device’s WiFi Network Using WPS
This section shows you how to connect a WiFi device to the Multy Device’s WiFi network using WPS. WPS (Wi-Fi Protected Setup) is a security standard that allows devices to connect to a router securely without you having to enter a password.
WPS Push Button Configuration (PBC)
This example shows how to connect to the Multy Device’s WiFi network from a notebook computer running Windows 10.
1 Make sure that your Multy Device is turned on, and your notebook is within range of the Multy Device’s WiFi signal.
2 Push and hold the WPS button located on the Multy Device until the WiFi or WPS LED starts blinking slowly.
Alternatively, log into the Multy Device’s Web Configurator, and then go to the Network Setting > Wireless > WPS screen. Enable WPS and Method 1 PBC, click Apply, and then click the WPS button.
Alternatively, log into the Multy Device’s Web Configurator, and then go to the Network Setting > Wireless > WPS screen. Enable WPS and Method 1 PBC, click Apply, and then click the WPS button.

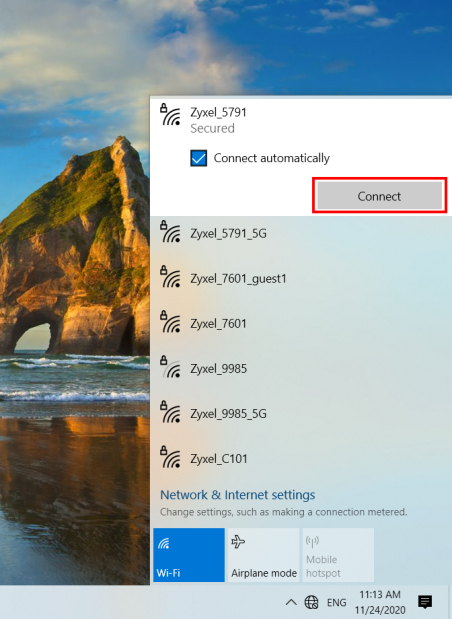
3 In Windows 10, click on the Network icon in the system tray to open the list of available WiFi networks.

4 Locate the WiFi network of the Multy Device. The default WiFi network name is “Zyxel_XXXX” (2.4G) or “Zyxel_XXXX_5G” (5G). Then click Connect.
The Multy Device sends the WiFi network settings to Windows using WPS. Windows displays “Getting settings from the router”.
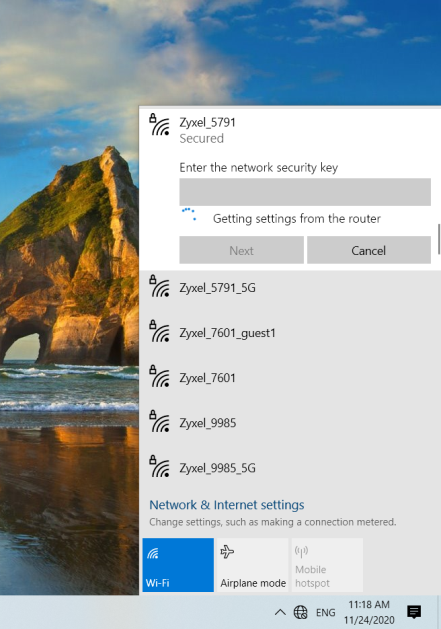
The WiFi device is then able to connect to the WiFi network securely.
Setting Up a Guest Network
A company wants to create two WiFi networks for different groups of users as shown in the following figure. Each WiFi network has its own SSID and security mode. Both networks are accessible on 2.4G, 5G, and 6G WiFi bands.

• Employees (E) using the GENERAL WiFi network group will have access to the local network (LAN) and the Internet.
• Visitors (G) using the GUEST WiFi network group with a different SSID and password will have access to the Internet only.
Use the following parameters to set up the WiFi network groups.
General | Guest | |
|---|---|---|
2.4/5G SSID | Employee | Guest |
Security Level | More Secure | More Secure |
Security Mode | WPA3-SAE/WPA2-PSK | WPA3-SAE/WPA2-PSK |
Pre-Shared Key | ForCompanyOnly | guest123 |
1 Go to the Network Setting > Wireless > General screen. Use this screen to set up the company’s general WiFi network group. Configure the screen using the provided parameters and click Apply. Note that if you have employees using 2.4G, 5G, and 6G devices, enable Smart Connect to use the same SSID and password. Clear it if you want to configure different SSIDs and passwords for 2.4G, 5G, and 6G bands.

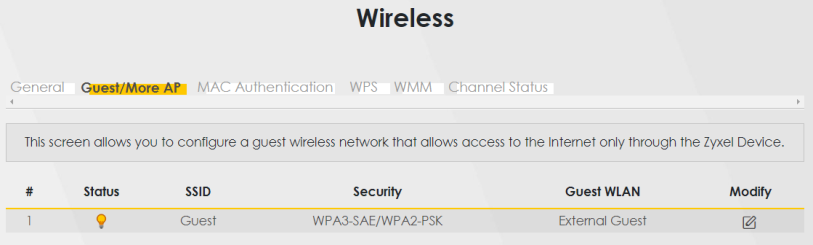
2 Go to the Network Setting > Wireless > Guest/More AP screen. Click the Modify icon to configure the second WiFi network group.
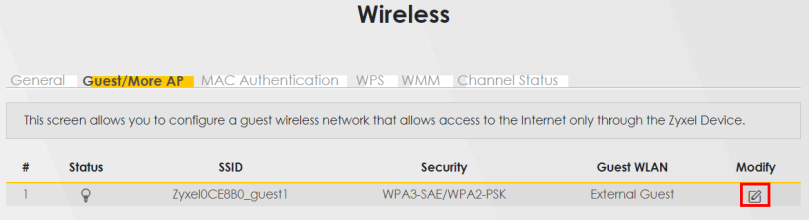
3 On the Guest/More AP screen, click the Modify icon to configure the other Guest WiFi network group. Configure the screen using the provided parameters and click OK.

4 Check the status of Guest in the Guest/More AP screen. A yellow bulb under Status means the SSID is active and ready for WiFi access.