Network Security
This section shows you how to configure a Firewall rule, Parental Control rule, and MAC Filter rule.
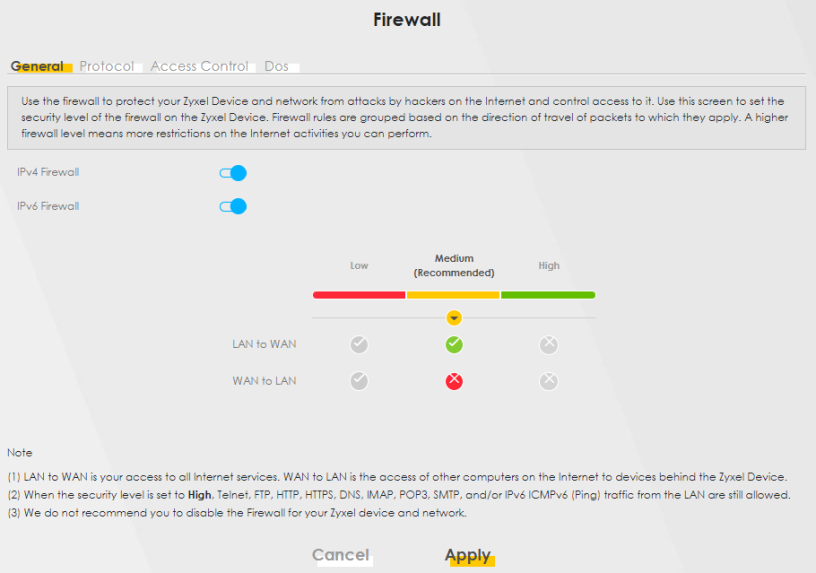
Configuring a Firewall Rule
You can enable the firewall to protect your LAN computers from malicious attacks from the Internet.
1 Go to the Security > Firewall > General screen.
2 Select IPv4 Firewall/IPv6 Firewall to enable the firewall, and then click Apply.
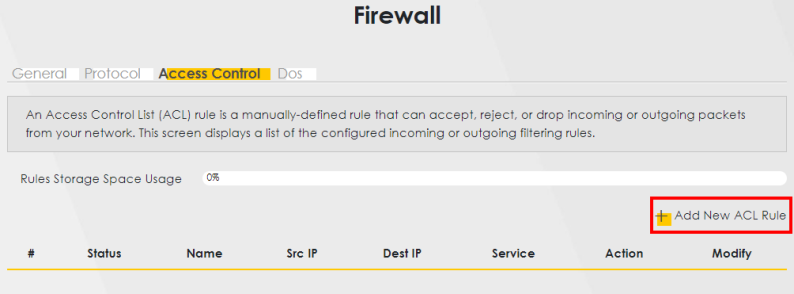
3 Go to the Security > Firewall > Access Control screen. Click Add New ACL Rule to create a rule.
4 Use the following fields to configure and apply a new ACL (Access Control List) rule.
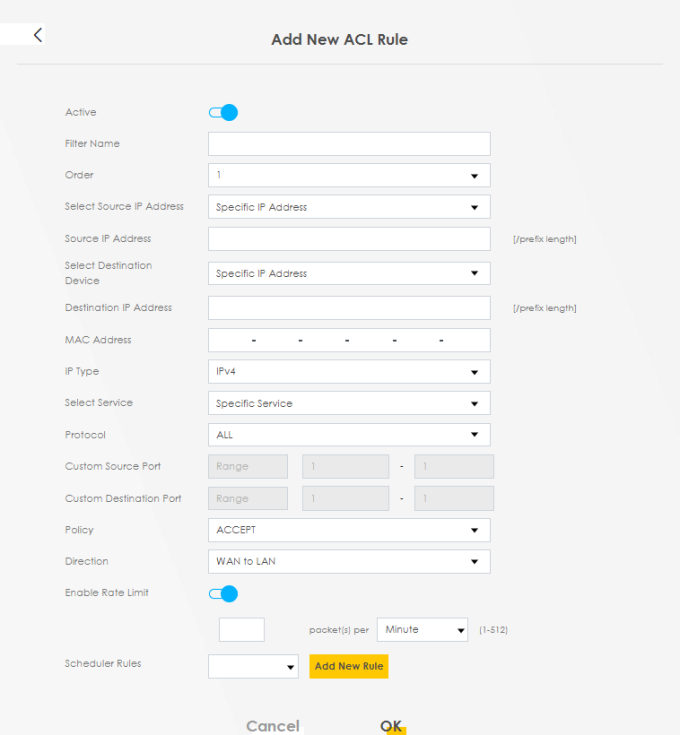
• Filter Name: Enter a name to identify the firewall rule.
• Order: Assign the order of your rules as rules are applied in turn.
• Select Source IP Address: If you want the source to come from a particular (single) IP, select Specific IP Address. If not, select from a detected device.
• Source IP Address: Enter the IP address of the computer that initializes traffic for the application or service.
• Select Destination Device: If you want your rule to apply to packets with a particular (single) IP, select Specific IP Address. If not, select a detected device.
• Destination IP Address: Enter the IP address of the computer to which traffic for the application or service is entering.
• MAC Address: Enter the MAC address of the Multy Device.
• IP Type: Select the type (IPv4 or IPv6) of the Source/Destination IP address.
• Select Device: Select the device you want to block or allow from the drop down list box.
• Protocol: Select the protocol (ALL, TCP/UDP, TCP, UDP, ICMP or ICMPv6) used to transport the packets.
• Custom Source Port: Enter the port number that defines your rule.
• Custom Destination Port: Enter the port number that defines your rule.
• Policy: Select whether to (ACCEPT, DROP, or REJECT) the packets.
• Direction: Select the direction (WAN to LAN, LAN to WAN, WAN to ROUTER, or LAN to ROUTER) of the traffic to which this rule applies.
5 Select Enable Rate Limit to activate the rules you created. Click OK.
Parental Control
This section shows you how to configure Internet access rules for individual or a group of LAN/WiFi clients in a profile using parental control.
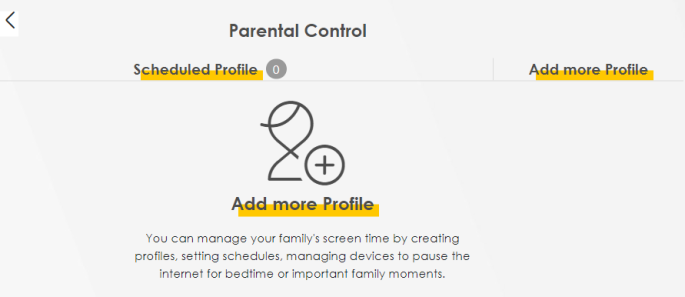
Parental Control Screen
Go to the Security > Parental Control screen.
Configuring a Parental Control Schedule
Parental Control Profile allows you to set up a schedule to limit the days and times wired or WiFi clients can access the Internet. You can set up parental control profiles for groups or individual clients.
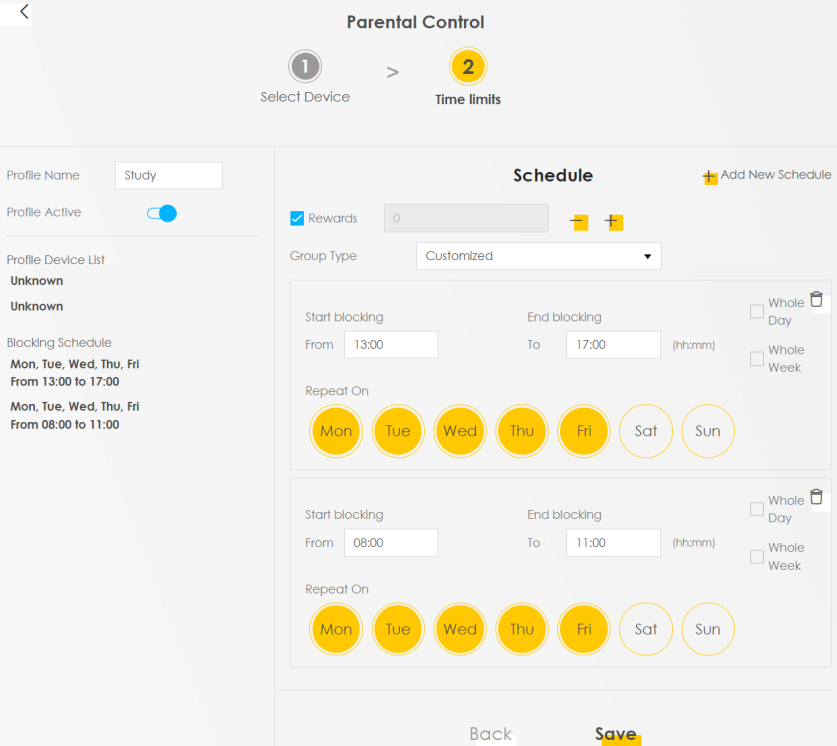
This example shows you how to block an user from accessing the Internet during time for studying. Use the parameter below to configure a schedule rule.
profile name | start blocking | end blocking | repeat on |
|---|---|---|---|
Study | 8:00 am | 11:00 am | from Monday to Friday |
1:00 pm | 5:00 pm | from Monday to Friday |
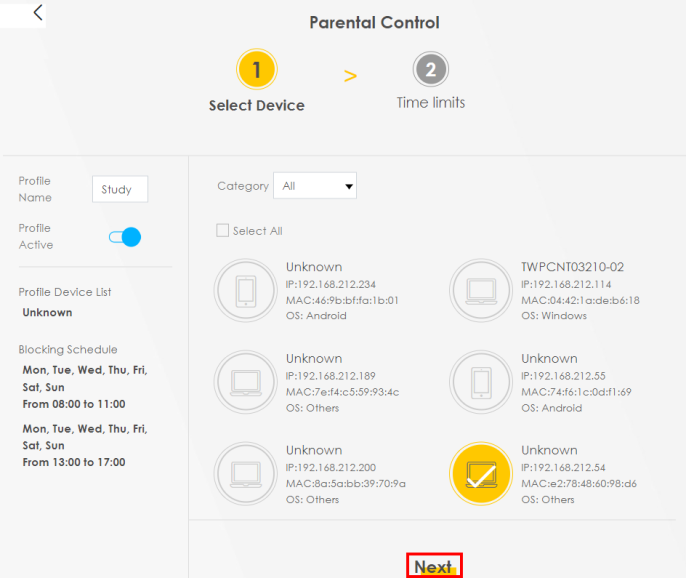
1 Click Add more Profile to open the Parental Control screen.
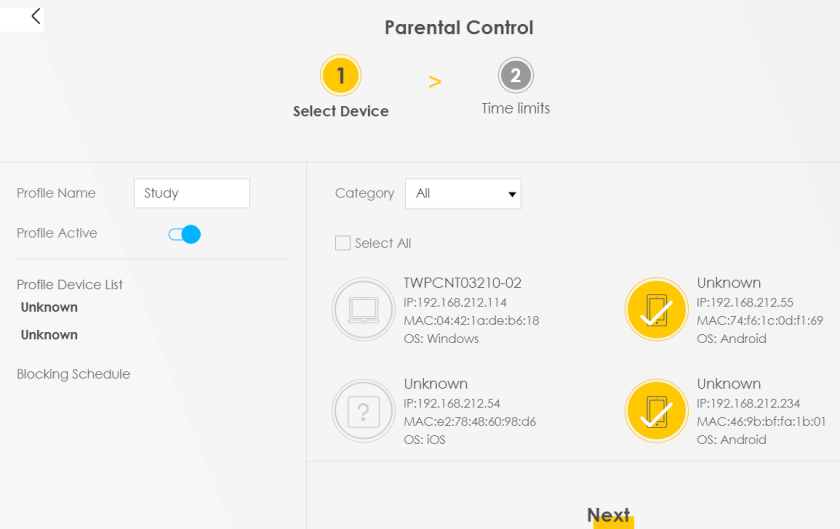
2 Use this screen to add a Parental Control rule.
• Enter the Profile Name given in the above parameter.
• Click on the switch to enable Profile Active.
• Select a Category to show the connected LAN devices under that category. Select All to show all connected LAN devices.
• Select a device, or Select All devices. The Profile Device List lists the devices you select. It shows Unknown if the client device does not have a recognizable host name or when the Multy Device is still fetching the client device information. Click Next to proceed.
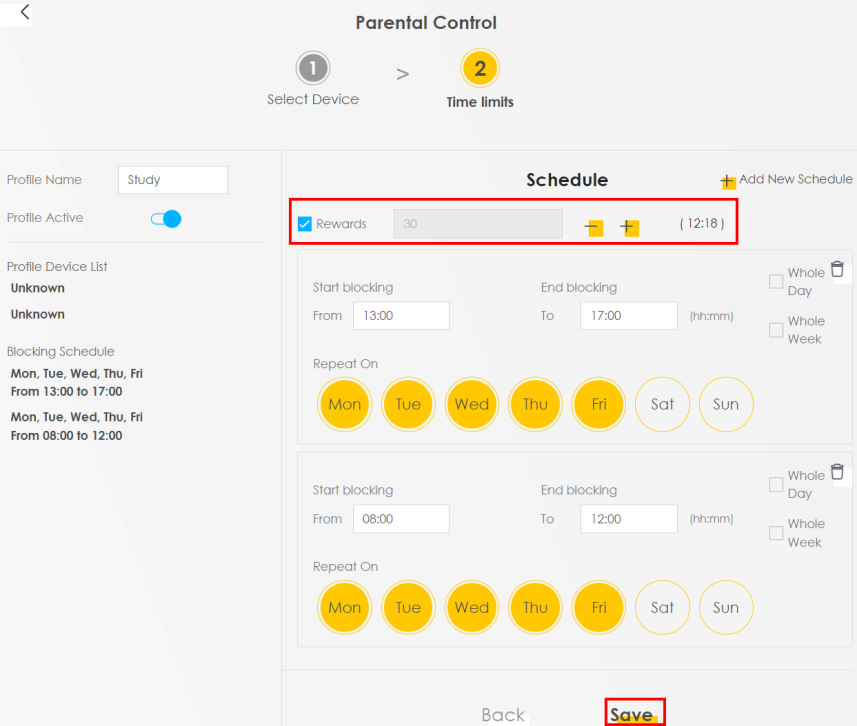
3 Use this screen to edit the Parental Control schedule.
• Click Add New Schedule to add a second schedule.
• Use the parameter given above to configure the time settings of your schedules.
• Click Save to save the settings.
Resuming Temporary Internet Access for Blocked Clients
You may want to temporarily resume the Internet access to wired of WiFi clients in a profile when blocking is active. Use this screen to set an immediate Rewards time of Internet access for such clients.
1 Go to the Security > Parental Control screen. Click the Extend icon ( ) of an existing profile and click Edit.
) of an existing profile and click Edit.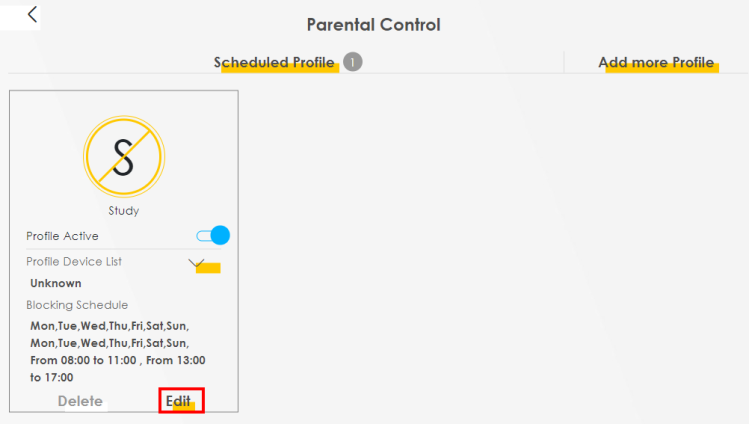
2 Click Next.
3 Select Rewards and set the time period (in minutes) during which clients can temporarily resume their Internet access. Check the Rewards end time (hh:mm) displays in the parentheses. Click Save. The Rewards time starts immediately after you click Save.
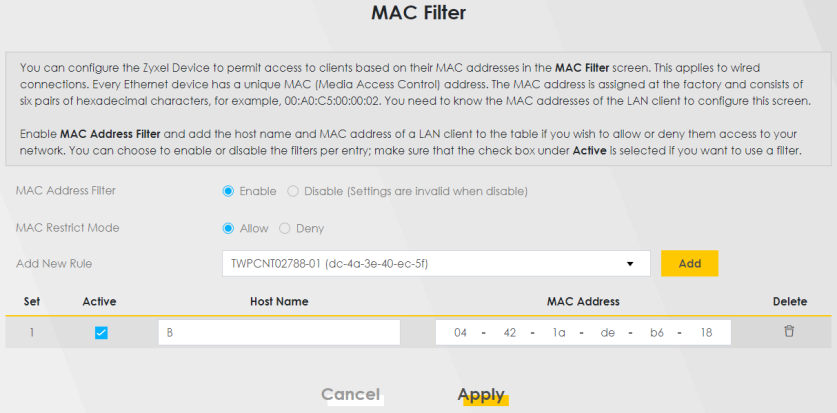
Configuring a MAC Address Filter
Use a MAC address filter to exclusively allow or permanently block someone from connecting to your WiFi based on the MAC address of the device they are using to connect.
This example shows that computer (B) is not allowed access to the WiFi network.
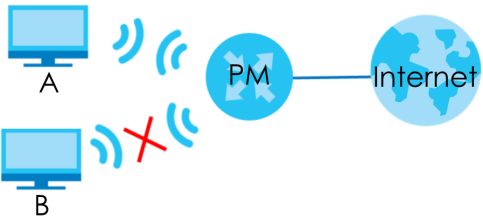
1 Go to the Security > MAC Filter screen. Under MAC Address Filter, select Enable.
2 Set the MAC Restrict Mode to Deny to block computer (B) from accessing your WiFi network.
3 Click Add to add a new entry. Select Active, and then enter the Host Name and MAC Address of computer (B). Click Apply to save the changes.